
step 1) you will need a handful of black tea bags, WOOL or WOOL / RAYON felt, a glass dish, and boiling water. Make sure you are not using acrylic felt. cut your felt into pieces that will fit in your dish.
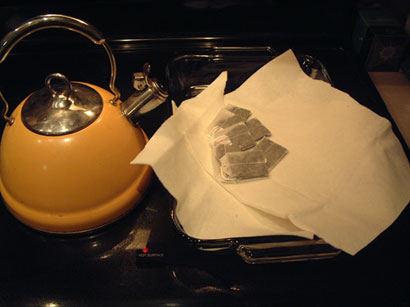
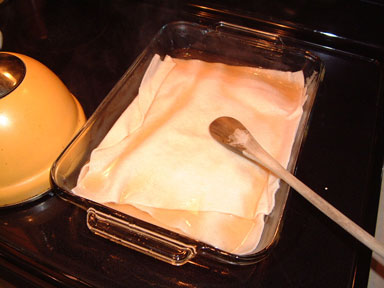
step 2) place the tea bags in the glass dish and pour the hot water over them. let them seep for a few minutes and add your wool felt, one piece at a time, making sure the wool is saturated. i used a wooden spoon to assist. let your wool felt rest in the tea for at least a half and hour. if you allow the felt to fall into folds then the color will vary a bit, which i like.
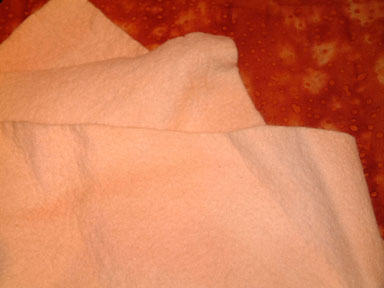
step 3) remove the wool felt from the tea bath, squeeze out excess fluid, and toss in a hot dryer for about a half hour or until dry. this will cause the felt to shrink a bit and fluff up, creating a pleasing organic texture.
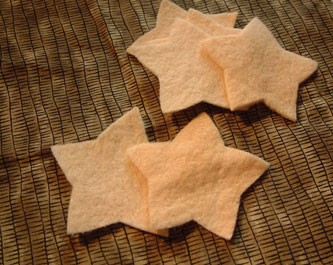
step 4) when your felt is dry, cut simple shapes from it. you can use christmas clip art, or trace around cookie cutters if you do not feel making a pattern freehand. i drew my pattern on paper, cut out, and taped to the felt then cut out. cut 2 pieces for each ornament.
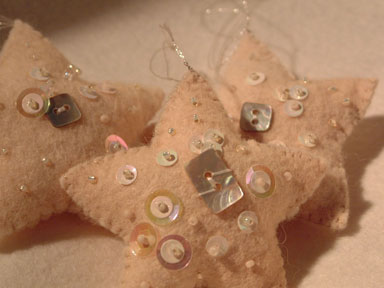
step 5) using strong thread, stitch beads and sequins to your felt. you can see in some places i staked a larger sequin under a smaller sequin, then went through a bead, then back down through the 2 sequins. i also used some mother - of - pearl buttons. for thread i suggest beading thread, selected to match your felt. if you do not have beading thread you could use 1 strand of embroidery floss, which is also strong.
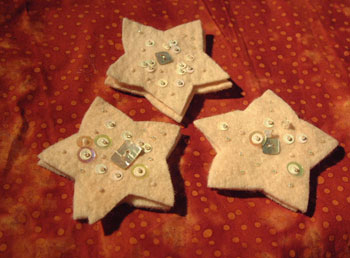
step 7) lastly, place your back and front pieces wrong side together and stitch shut using blanket stitch or whipstitch. before you go all the way around, stuff the star with a bit of stuffing. add a hanger (i like to use metallic floss,) and your ornament is done! the background in this photo is undyed felt. you can see the dyed felt has a light antique look. if you want yours to be darker, use more teabags.
enjoy! i would love to see what YOU make!
No comments:
Post a Comment