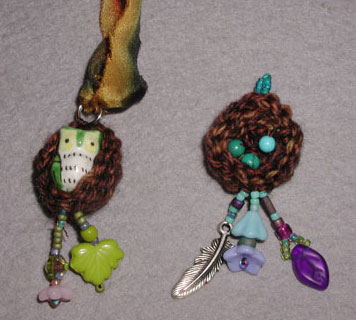
I came up with this idea and I thought I'd provide you with some instructions. These make cute necklaces, or you could make smaller nests for earrings, or perhaps larger nests for holiday ornaments.
You will need:
A few yards of sock weight yarn
Crochet hook, size E
Sewing or beading thread to match your sock yarn
Assorted beads and charms including bird, feather, leaf, and /or flower beads
A beading or needle small enough to fit through your beads
A split ring
A pretty ribbon
How to crochet the nest:
chain 5 stitches and join in a ring. Place stitch marker if desired to mark the start of your rows. On such a small item I sometimes forego the stitch marker and just keep track of where I am,
Round 1: 2 single crochet in each stitch in the ring.
Round 2: 2 single crochet in 1st stitch, 1 single crochet next stitch, repeat till end of round.
Round 3: 2 single crochet in 1st stitch, 1 single crochet in next 2 stitches, repeat till end of round
Round 4: single crochet the whole round.
You may continue for a few more repeats of round 4 if desired to make a deeper nest.
(For larger nests start with thicker yarn / bigger crochet hook and / or add more increase rounds like rows 2 or 3. In these rounds, space several increases evenly throughout the round. Crocheted nests, like nests in nature, can be formed organically, adding increases to widen the nest wherever they seem appropriate.)
Finish and work ends in.
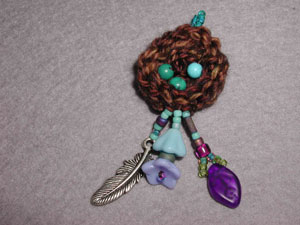
Using your beading thread sew beads into the nest and hanging off the bottom of the nest as fringe. For the blue nest I sewed 3 small turquoise into the nest to look like eggs. I also hung fringe off the bottom of the nest and sewed a split ring to the top of the nest to function as a hanging loop.

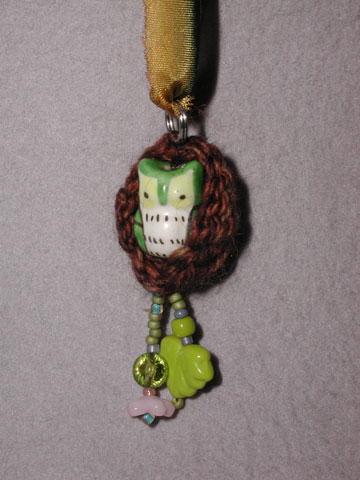
For the green nest i sewed a ceramic owl bead into the nest, hung fringes off the bottom, and sewed a small split ring to the top of the nest to function as a hanging loop. I threaded a hand dyed silk ribbon through the split ring to make a simple necklace.

Finish by knotting your beading thread and working the ends in.
Happy Beading!
Megan Noel

No comments:
Post a Comment